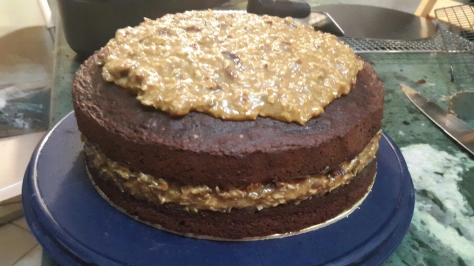
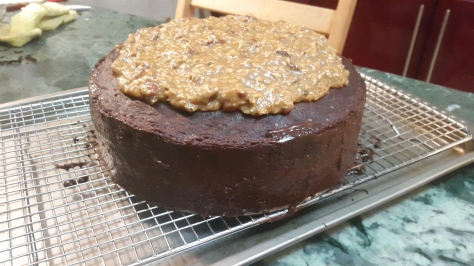
Yummilicious is the word I use to describe this cake, well torte actually. More traditionally its called Germans Chocolate Cake. The cake itself is very chocolaty, moist, and almost fudge-like. You can make just the cake for a lovely tea time cake (just half the quantities and use 2 large and 1 small egg)
The recipe looks long, well it is, I know but don’t let that scare you away.
It’s only as I am describing in detail. If you’ve made cakes before then you probably know what’s written below already!
Break it over 2 days and it’s a breeze! Prep the dulce de leches & make the caramel coconut pecan filling on one day and the cake and assembly the second day. The ganache has to be made after the cake is assembled as it will thicken a lot as it cools and you need to be able to pour it.
Notes:
- Have all your ingredients at room temp. Nothing cold or straight out of the fridge. Your butter should be solid but not hard.
- Use natural cocoa not Dutch processed (I used Hersheys)
- The caramel and ganache quantities will make more than what you need for this, make truffles with the rest 🙂 I know I should scale them down, but they taste delicious, I feel its a shame!
P.S. Sorry, but I have never done this recipe by cup so I can’t add conversions for that!
Enjoy!
Chocolate Torte with Coconut Pecan Caramel filling
Eggs, seperated
Cake Flour
Natural Cocoa powder
Fine white Sugar
Dark Brown sugar
Unsalted butter
Buttermilk (rayeb)
Boiling water
Vanilla
Baking powder
Baking soda
Salt
Some Oil
280 ml (5 large eggs)
300 gm
100 gm
350 gm
130 gm
220 gm
120 ml
240 ml
5 ml or 1 tsp
15 gm (3 tsp)
1/2 tsp
a good pinch
To grease the cake tin
- Mixing bowl and electric egg beater or free standing cake mixer with paddle.
- 2 cake tins: 25cm (10 inch) , with high sides & removable base, oiled and base lined with grease proof paper (You can still use a 24 cm but just fill to quarter the height).
- Rubber spatula
- Hand whisk
- Pastry brush
- Electronic scale
- Several bowls and spoons
- Deep sauce pan or small pot.
- Cake racks
Method:
Start with the caramel filling:
- Boil the condensed milk tins as if making dulce de leche but boil for 2 hours only – method here.
- Add water and brown sugar in a deep sauce pan and melt over low heat. Keep an eye on it as it melts, once most sugar is dissolved give it a stir and leave till it starts to bubble but still keep an eye on it.
- In the mean time, empty the can of coconut milk in another small pot and stir till milk & cream are combined & its warmed through.
- Back to the caramel, when the sugar surface is all bubbling away and looks thick when you stir it, pour in the warmed coconut milk into the caramel (take care it might sputter) and stir till incorporated & smooth. Leave to thicken on low heat, stirring every once in a while. You want thick, glossy & smooth and coats the back of a spoon. Should take about 25 min.


- Stir the dulce de leches into the caramel base. Stir well till smooth. Leave to cool.
- Once cool, add in chopped nuts, salt/crushed salt flakes, vanilla and coconut & stir in. Taste to adjust sweetness (add more salt if too sweet) (if using regular salt, only add a pinch or 2 not a whole teaspoon!)
- Set aside.
For the ganache: (make this only after you assemble the torte)
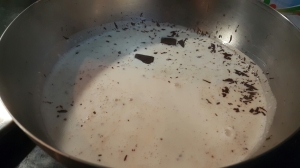
- Heat cream until almost at simmering point.
- Pour hot cream over finely chopped chocolate in a heat proof bowl.
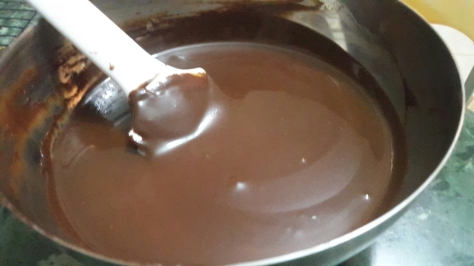
- Leave for 1 min then stir with spatula till chocolate has melted.
- Add in 2 tbsps (30gm) butter and stir till melted. (keeps it shiney)
- Dont whip it. We dont want air bubbles.
- Leave to cool a little bit then pour over the torte. It will thicken as it cools so use it while still pourable.
For the cake:
- Preheat your oven to 180 C or 160 C convection/fan forced.
- Prep your cake tin:
- Choose a cake tin with high sides & a movable base.
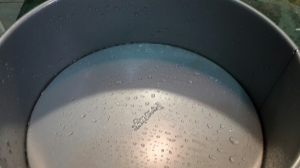
- Using the pastry brush, brush the tin base & sides with oil and line the base with grease proof paper. Then set aside.
- Make the Cake:
I use the creaming method which goes like this:- Weigh & measure out your ingredients first.
- In a bowl or jug, add the boiling water to the cocoa powder and whisk till completly disolved. It will be like a smooth sauce. Set aside.
- In a bowl whisk together the baking powder, baking soda & the cake flour & salt. Set aside.
- Seperate the eggs. Keep the whites in a clean greasefree bowl. In another bowl add the vanilla to the egg yolks.
- In the main mixing bowl add the sugars & butter.
- Cream butter with sugars till the colour lightens and sugar is fully mixed in with the fat & looks a bit fluffy. Don’t over beat please!
- Start adding in the yolks, 1 egg yolk at a time. Do not add the next yolk until the previous is beaten in well.
- Use the spatula every once in a while to scrape the bowl down and make sure everything on the bottom is being mixed in.
- After all the egg yolks are added in, add in a quarter of the flour mix then beat in till combined. Use a low speed setting first then increase speed so you don’t blow out the flour.
- Every once in a while use a rubber spatula to lightly scrape the bottom of the mixing bowl to make sure nothing is lurking down there not being mixed or beaten in!
- Add a third of the cocoa sauce and beat till combined.
- Another quarter of the flour and beat till combined.
- Add another third of the cocoa sauce and beat till combined.
- Add another quarter of flour and beat till combined.
- Add the last of the cocoa sauce and beat till combined
- Add in the buttermilk and beat.
- Add in the last quarter of your flour and beat in.
- Now in the bowl with the egg whites, add a pinch of salt and beat the egg whites till firm peak stage. That’s when the egg whites don’t move in the bowl and the top of the whites stays upright like in the bottom pic.
- Give another scrape to the batter mixing bowl with the spatula to make sure all is well mixed before you start to add the egg whites.
- Now with a big metal spoon or spatula, spoon in 1/4 of the egg whites into the batter and mix lightly to loosen the batter.
- Now add half of egg whites and start folding in gently to not crush the air out. Fold in moving the spoon in a circular motion from the bottom up and over till the egg whites are mixed in. Repeat with the other half till all the egg whites are mixed in.
- Getting ready to bake:
You want to get your cake into the oven as soon as you’re done mixing so you don’t wind up losing the power of the baking powder, soda & egg whites!- Pour in the batter, splitting it between the 2 cake tins (filling up to only quarter the height of the tin). Gently shake the tins from side to side to level it and lightly smooth the surface of your cakes with a rubber spatula. Tap the tins once or twice sharply on your work surface to get rid of any large air bubbles.
- Baking the Cake:
- Place the cake tins in your preheated oven on the middle rack & set a timer for 30 minutes.
- DO NOT PEAK IN THE OVEN! For the first 30min of baking don’t open the oven please! Those 30min are critical for it to set properly, and opening that door oven is just inviting disaster!
- Open at 30min; the top should be set & the sides slightly shrinking away from the tin. Give the cake tin a gentle nudge to check its set in the middle. If yes, insert a thin skewer in the centre, if it comes out clean you are done. If not, give it an extra 5 min and check. Then another 5 minutes if still needed. It shouldn’t need to go beyond 40min – mine come out at 35min.
It sounds like a hassle but it isn’t really. You are just alternating wet and dry ingredients to maintain a stable batter. Too wet or too dry and you won’t get a good incorporation of the ingredients. And don’t overbeat so you don’t curdle the eggs or deflate the mixture. If your eggs do separate from the batter (liquid floating around a bumpy batter) just add a little flour in and beat so it absorbs the extra liquid. No reason to worry or panic! Add the egg yolks in slowly and in stages. So 1 at a time and then beat till combined.


You now have a pourable yet slightly thick batter with volume from the egg whites at the ribbon stage.

- Take them out and place them on a wire rack. Take a thin sharp knife and run it round the cake sides and loosen it from the tin incase any bits are sticking. The tops may be a bit puffy at this stage but the tops will level out as they cool. Leave to cool for 15minutes.
- Then take them out of the cake tins, remove the grease proof paper and place them on the wire rack to completely cool down.
Assemble the torte:
- Level tops of cakes if needed before assembly. Use a sharp serrated knife like a bread knife.
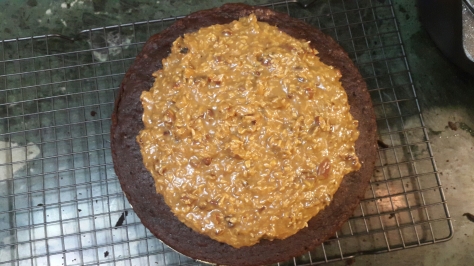
- Place 1 cake on a cake board and spoon on a thick layer of filling not reaching the edge.
- Top with the second cake’ bottom side down, and press down gently and lightly.
- Smooth the sides if any filling is coming out.
- Spoon another layer of filling on the top layer thicker in the middle than the sides to make a sort of dome shape.
- Sprinkle coconut over the raised portion of the ganache.
- Leave to set.
- When set, move to your serving plate (if you dont have a cake lifter, place the serving plate right at the edge of the rack beside the the cake then use a knife to lift up the edge of the cake base and place your other hand under the base and use it to start sliding it over to the serving plate).
- Best to let it set for a little while more in the fridge, maybe an hour before slicing.
If you are worried about lifting and moving the cake, don’t 🙂 Place the cake on your cake base or serving plate and assemble then pour the ganache over it but with a bit of finesse to minimise the cleaning around the cake afterwards. Leave to set completely then clean away the extra ganache after it sets by cutting it from around the cake then with a moist towel wipe away any chocolate smudges from the plate.
That’s what I did the first time I made this torte a few years ago! I had no cake board, cake lifter or any intent to move this so I did the assembly, filling & pouring all on the blue tray and served from that. I didnt glaze/coat it either! I left the pouring gaps and chocolate pools too as I liked the look!
I hope you enjoy!
Notes:
- Egg sizes: we don’t have grades here 😦 so if not using a scale go for 5 large or 5 medium and 1 very small egg. Large are about 60 -65 gm in the shell and medium about 55 gm. Shell weight is roughly 7 – 9 gm.
- 15 gm baking powder is just a little less than 1 sachet Cooks baking powder which is 16 gm.
- You can replace the buttermilk with water for a more intense chocolaty flavour but a little less moist. If you do, use only 60ml water and omit the baking soda.
- If you can’t find cake flour, use regular flour then take out 4 level tbsps flour and replace with 4 level tbsps corn starch. That’s about 40 gm removed and replaced. Whisk them well together before using.
- Scrape the left over ganache from pouring over the cake back into your bowl and re-use. The left over ganache can be rolled or scooped into truffles. How-to in another post soon :-).


